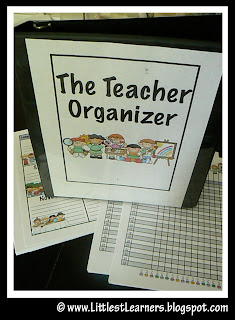
 Feel like putting the finishing touches on your ULTIMATE TEACHER ORGANIZATION TOOL today? We need to because I have a new project to start you on this week.
If you've been following along and diligently creating your UTOT you should be admiring an almost completed project. Today we are going to put the finishing touches on it.
To recap:
We have a binder, page dividers or tabs, and possibly some clear plastic page protectors. At some point you may want to add one of those flat, 3-hole punches that are designed to fit into binders so you can easily punch holes and add things no matter where you are. (Because if simply flaunting your new UTOT at the first staff meeting of the year won't have people whispering about the new and improved organized you then three hole punching the meeting's agenda as it is passed out and adding it to the tabbed meeting section will have their jaws on the floor.)
- the plan book section
- your classroom procedures manual (btw, I've received a lot of messages inquiring about some of my procedures...I'll post my manual soon for you)
- a section for meeting notes
- a section to hold handouts, agendas, etc.
- your routines section
Today we are going to finish it off with a little bit of practicality and a whole bunch of uber-fabulousness.
#1 Add a pencil pouch (good news: Target has them on sale for $.050 cents this week. bad news: I personally don't know how it is humanly possible to get out of Target dropping only 2 quarters in the palm of the red shirt, khaki pant wearing cashier so the cheapo pouch could very well end up costing you $68.47. You've been warned).
#2 Fill the pencil pouch with a pencil, two pens, a thin dry erase marker (if you are putting your routines into plastic sheets) and $5.00 to $10.00 in singles. If you are like me then you don't typically carry cash. Yet, I find there are times when I often need cash. Usually those times take place at school. Someone is always peddling their kid's band candy, collecting for something or perhaps you'll need to order lunch unexpectedly. And let's be honest, there are days when you would be willing to break into the vending machine at 3:10 p.m. so having a dollar or two handy is a better option.
#3 The next thing you need to do is add one more section with lined paper titled, "Been There, Done That." As you know I love me some list making. Unlike, the proverbial to do list that never ends this is a list that will make you feel good and will help you in the years to come. It's the "Got it Done List." As you are preparing for the new school year, jot down each task you complete. You may also record the items that you bought (name tags, desk plates, folders, etc). At some point between October and June, type this up all fancy-like. It will become a wonderful tool as you prepare for school next year.
#4 The last thing you need to do it make it your own. This is the uber-fabulous part. Do you remember going off to college and making a collage to display on the cinder block walls of your dorm room? It's kind of like that. Use that clear plastic pouch on the back of your binder to display things that make YOU happy. Things like family photos, postcards from your happy place, inspirational quotes, my website address so you don't forget about me when summer is over...sniffle, sniffle).
And that's that! I would LOVE to see pictures of your finished product. If you feel like sharing you can email them to me at littlestlearners@gmail.com

Hi Jodi! Today I purchased your plan book set...and I have to thank you for taking the time to create something so practical and cute! I enjoyed putting it together...and can't wait to start using it...I know this will help me keep organized...I loved it so much...I even blogged about it!
ReplyDeleteThanks again!
Gladys
http://teachinginhighheels.blogspot.com/
I also added post-it notes to my pencil pouch. And am adding a section for all my schedules. I'll put those in protective sheets. Thanks again for all the ideas for the binder.
ReplyDeleteJodi I can't wait to show off my binder at a committee meeting tomorrow. I have my "notes" section separated into team notes, staff meeting notes, PBS committee notes, and hospitality committee notes so I can keep them all straight. I even made a cute cover for it and I'm going to make the back tonight(using pics like you suggested) You rock! I bet your team loves you! I wish you lived nearby so you could come help me figure out what to do with my room. LOL
ReplyDeleteI blogged about parts of what I created thanks to your ideas for this binder and just wanted to share it with you. Thanks for your ideas!
ReplyDeleteWould have helped to link it... sorry! Here it is:
ReplyDeletehttp://cyndy-loveofpaper.blogspot.com/2010/08/its-paper-but-working-type.html